Tips & Tricks
Preparing for Your New Waterjet – Part 2
A technician has been scheduled to install your new waterjet. You should be up and running soon. To ensure a quick and seamless process and give you or your team more time for onsite training, there are a few items you will need to take care of to expedite the process. In this 2-part series, we'll take a look at process in installing a new OMAX Abrasive Waterjet. Review part 1 here.
Scheduling Forklifts
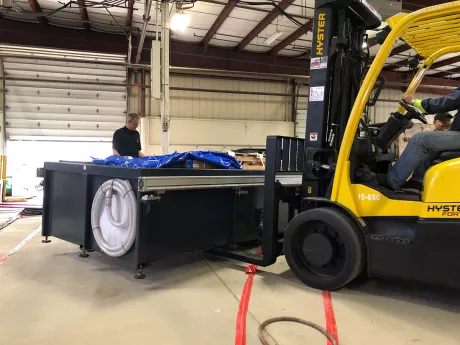
Waterjet catcher tanks are heavy, so a forklift will be necessary to unskid and move your waterjet into the prepped floor space. Review the lifting requirements for your particular machine and have a forklift with a certified operator available when the technician arrives at your facility.
The technician will remove the blue protective wrapping from your machine tank before preparing the removal of the pump and bridge using the forklift along with straps or slings. Once the tank is emptied, it’s time to remove it from the shipping skid and place it in its new home.
Once you and the technician are happy with the machine’s location, the tech will level the tank to the floor to ensure the most accurate cutting. Once leveling is completed, it’s back to the forklift to install the gantry, or bridge, onto the linear drive rails. A second person from your shop will be needed to help guide the gantry into place.
Installing Hard Plumbing
Next, the technician will begin installing the hardline plumbing that connects the machine to the pump. It’s a good idea to have your waterjet operators and maintenance personnel available from this point forward so they will know how to troubleshoot and fix any leaks along the line – and know how to replace the hard plumbing when it comes time to do so.
After the plumbing is ready, the forklift will be used again to place the pump so it connects directly to the plumbing.
Scheduling Electricians and Plumbers
Once the pump is in place, you will need a certified electrician scheduled to tie in 480 volt, 3 phase power to the pump. This should be schedule for the end of the installation day or the beginning of the day after, assuming there aren’t any unforeseen issues and the space has been properly prepped. You should confirm the schedule with the technician when they arrive onsite or call OMAX and check on the tentative schedule with your assigned technician ahead of time.
Once you have power and any additional accessories have been installed and connected, you are ready to move onto the water and drain connections. This means you can begin to fill the tank, install the cutting head and start calibrations.
Calibrating Your Machine
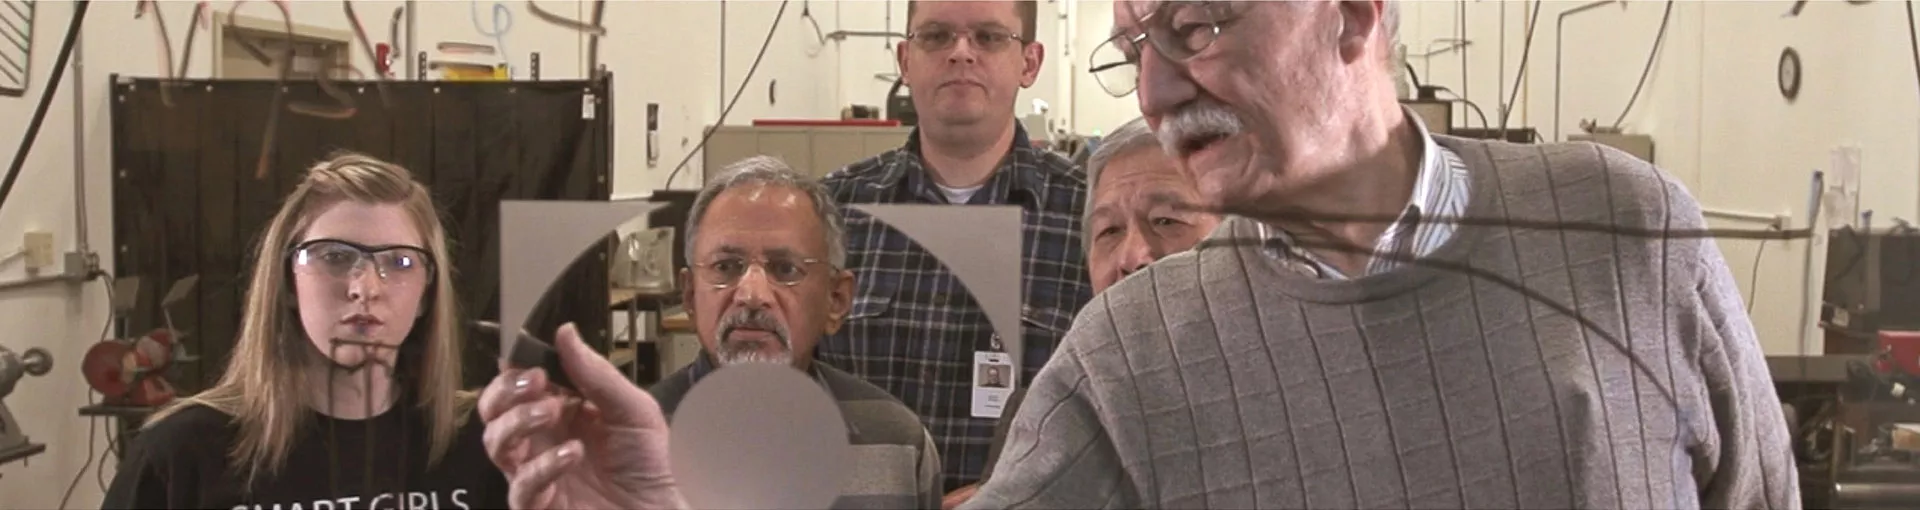
While waiting for your catcher tank to fill, the technician will go over the calibration and homing procedures with your staff. These procedures will need to be performed regularly for the most accurate cutting, so it is critical you have your staff available to go over these items.
Testing Your Machine
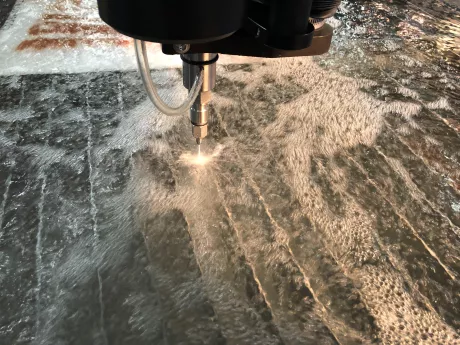
Once the tank is filled with water to the slat bed, you can begin testing the nozzle, dialing in your pump pressure and checking for any leaks along the lines. This will ensure you maintain pressure along the entire system for a uniform cutting stream. Your staff will be shown what a water-only jet and an abrasive-carrying jet should look like, as well as possible causes for a non-standardized jet.
It’s now time to do a test cut and further dial in your machine for the most precise cutting. The technician will likely have your staff perform this procedure in order to go over the sample part and explain what to look for and what it means.
Time for Cutting
Now that all of the calibration and testing steps have been completed, it’s time for training. The technician will go over the steps to program a part, set up a home position, and cover startup and shutdown procedures that will be done at the beginning and ending of each day.
Once these basics are covered, real cutting can begin. Is there a specific part you want to be trained on for optimizing the cutting precision, or do you want your staff to perform basic cutting at this point? Are you using machining files from outside sources that you want to learn how to clean and import, or are you planning on creating most of your part files in the IntelliMAX software yourself? The more information you provide the technician, the more specific the training and cutting demonstrations will be.
Next Steps
Once your machine is installed, you can begin taking on new jobs and getting familiar with waterjet cutting. After your operators have spent some time on the machine, a refresher training course at OMAX Corporation is always a good idea. The more familiar your staff is with the software and machine calibration and maintenance, the more you can add to your profitability by bidding on more challenging jobs.
Training at OMAX headquarters is free – and you and your team should take advantage of this opportunity, since a knowledgeable operator is a successful operator. To keep up with the latest information from OMAX, don’t forget to create an account in the Customer Dashboard to ensure you have access to the latest online training sessions, videos and eLearning modules as well as easy 24/7 part ordering.
Happy cutting!