Glass Cutting Tips: OMAX IntelliMAX Settings for Cleaner Edges
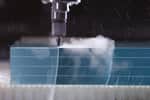
Tighter tolerances across fabrication environments have pushed shops to rethink how they process brittle materials like glass. Traditional methods introduce heat, stress, or contact forces that create micro-cracks and edge defects. Abrasive waterjet changes that equation. It removes material without heat and without mechanical contact, giving you a controlled, predictable way to produce clean edges on fragile substrates.
If you are running OMAX systems, the IntelliMAX Software Suite gives you the control needed to make glass cutting repeatable. The difference between chipped edges and production-ready parts usually comes down to a handful of settings and shop practices. When those are dialed in, secondary finishing often drops out of the process entirely.
This guide focuses on what actually moves the needle. Toolpath choices, piercing strategy, and physical setup all work together. Miss one, and results fall off quickly.
Why Waterjet Works for Glass
Glass is sensitive to both thermal and mechanical stress. That is where abrasive waterjet has a clear advantage.
Cold Cutting Without Material Damage
Abrasive waterjet is a cold cutting process. There is no heat-affected zone, no thermal distortion, and no phase change in the material. The glass maintains its original structure from edge to center. That matters when you are working with tight tolerances or need consistent part strength.
Clean Edges Without Secondary Work
With the right parameters, the process produces smooth edges without burn marks or burrs. In many cases, parts come off the table ready for use. If you are still grinding or polishing edges, it is usually a sign that something in the process needs adjustment.
Broad Material Capability
The same system you use for metals can handle annealed glass, laminated glass, quartz, and composites. Tooling does not change. The process stays consistent. If you want a full overview, refer to the What Materials Can Waterjet Cut section on the OMAX site for supported materials and examples.
IntelliMAX Settings That Matter for Glass
Glass is not forgiving. The IntelliMAX software gives you the tools to protect the material, but you need to apply them intentionally.
Toolpath Strategy in IntelliMAX LAYOUT
LAYOUT is where most problems start or get prevented.
First, if possible always pierce off the part. Place lead-ins and pierce points in scrap areas whenever possible. The initial impact of the jet can create localized fractures. Keeping that away from your finished edge is critical.
Second, assign cut quality strategically. Not every region of the part needs the same speed. Slow down in corners and tight geometry. This reduces taper and helps the jet stay aligned through the full thickness of the glass.
Third, OMAX’s software, IntelliMAX, software will take over and engage optimized corner passing. The software adjusts speed as the nozzle enters and exits sharp geometry. Without this, the jet can lag behind the motion of the cutting head, which leads to blowout on the bottom edge.
Piercing and Motion Control in IntelliMAX MAKE
MAKE controls what happens at the machine. For glass, piercing is the highest risk step.
Selecting the correct material in MAKE is essential for the perfect cut. The IntelliMAX cutting models are refined to work with the OMAX waterjet set up building the know-how of cutting the material into the computer.
Low-pressure piercing is non-negotiable. Start the piercing at reduced pressure, then ramp to full pressure for the cut. This soft entry reduces the hydraulic shock that causes cracking.
Timing between water and abrasive also matters. You want abrasive present as the stream hits the material. A delay where pure water hits first can fracture the surface before cutting even begins.
Beyond piercing, rely on the system’s internal motion control. IntelliMAX applies compensation for acceleration, corners, slowdowns, bevels, interior and exterior angles. Let the software manage those transitions so movement stays smooth across the material.
Shop Setup That Supports the Process
Software gets you part of the way there. Physical setup finishes the job.
Use Sacrificial Backing Material
Glass needs support during both piercing and cutting. Without it, the exit side of the cut can chip or blow out.
Place a sacrificial layer under the glass. Common options for sacrificial material include Jet Brick, wood and cardboard. This backing absorbs jet energy as it exits and supports the material against deflection. The concept is the same as supporting thin sheet metal. Without backing, the material flexes and edges degrade.
Secure the Workpiece Without Adding Stress
Use fixtures that spread load across the surface. Avoid point pressure. Do not overtighten. Glass under stress is more likely to crack during piercing or when the jet transitions through corners.
The goal is stability without introducing new variables.
Consider Submerged Cutting
Running submerged can improve consistency.
It helps damp vibration, reduces splashes and keeps particulate from going into the air. It also stabilizes the cutting environment, which can lead to more consistent edge quality across longer runs.
Common Mistakes That Affect Edge Quality
Most issues with glass cutting come from a few repeatable mistakes.
One of the biggest is attempting to cut tempered glass. Tempered glass is internally stressed by design. Any attempt to pierce it releases that stress instantly and causes the panel to shatter. Only cut annealed, laminated, or untreated glass on a waterjet.
Another assumption is that rough edges are unavoidable. That is not accurate. If edges are rough, chipped, or frosted, the process needs adjustment.
Watch for these signals:
-
Frosting or micro-chipping at the pierce point usually means the pierce is too aggressive or abrasive timing is off
-
Rough edges along the cut path often indicate the cutting speed is too high
-
Visible taper or blowout on thicker glass points to speed control or standoff distance issues
Each of these ties back to settings you can control in IntelliMAX.
Process Adjustments That Improve Results
When something looks off, adjust one variable at a time.
If the pierce area is damaged, confirm low-pressure piercing is active and that abrasive flow begins at the right time.
If edge finish is inconsistent, reduce cutting speed in LAYOUT. Slowing down allows the jet to fully cut through without trailing.
If taper becomes noticeable, review your standoff distance and ensure it matches your setup. The jet needs to stay cohesive from nozzle to material surface.
Small changes make a noticeable difference with glass. Avoid large swings in parameters.
Building a Repeatable Glass Cutting Workflow
Consistency is what turns glass cutting from trial and error into a reliable process.
Start with a standard approach:
-
Low-pressure pierce every time
-
Slower speeds in corners and critical areas
-
Sacrificial backing under every sheet
-
Stable fixturing with minimal induced stress
From there, let IntelliMAX handle motion control and compensation. The software is built to manage the precision side. Your role is to give it the right inputs and a stable setup.
Over time, document what works for different glass types and thicknesses. That creates a baseline your team can follow, which reduces setup time and scrap.
Where This Fits in Your Overall Operation
Glass is often treated as a specialty process in mixed-material shops. It does not need to be.
When the process is stable, glass cutting fits into the same workflow as metals and composites. No tooling changes. No separate machines. Just adjusted parameters and proper setup.
If you want to expand capability or dial in a specific application, review OMAX system options or connect with your application team through the https://www.omax.com. They can provide guidance based on your material mix and part requirements.
Frequently Asked Questions
Q: What pressure should I use to pierce glass?
A: Start with a reduced pressure pierce, then ramp to full cutting pressure once the pierce is complete. Lower pressure minimizes shock and helps prevent cracking.
Q: How do I prevent chipping on the bottom edge?
A: Use sacrificial backing under the glass. This supports the material and absorbs the jet as it exits, reducing blowout.
Q: Do I need to polish edges after waterjet cutting?
A: In many cases, no. When piercing, speed control, and setup are correct, the edge quality is often good enough to eliminate secondary finishing.
Q: Can I cut tempered glass with a waterjet?
A: No. Tempered glass will shatter when pierced due to internal stress. Use annealed or laminated glass instead.
Q: Does waterjet cutting affect the structure of glass?
A: No. The process is cold cutting, so there is no heat-affected zone and no change to the material structure.